
Film Review: Midway (2019)
/
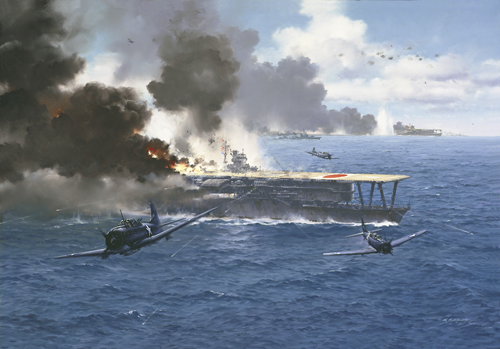
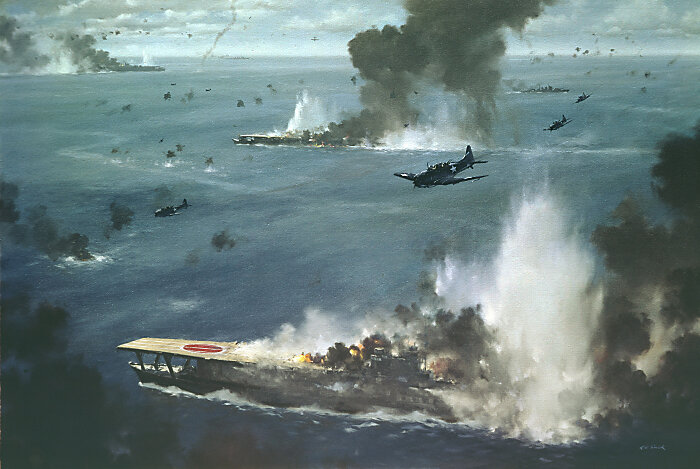
“Famous Four Minutes” by R.G. Smith
Midway Film Review
By mid-1942, the Japanese Empire stretched from China to the Central Pacific. For the six months following Pearl Harbor, the Japanese military won a string of spectacular victories against the United States and the European powers in the Pacific. Then in early June, everything changed. Thanks in large part to an intelligence coups, the Imperial Japanese Navy lost four aircraft carriers, and with them the initiative in the Pacific. The film Midway, directed by Roland Emmerich, is the most recent to depict this tumultuous event on film.
By Seth Marshall
In the spring of 1942, the Japanese were unsure of their next move. The previous six months had seen nearly constant action on the part of both the army and navy. The attack on Pearl Harbor had only been the first move; within a day came attacks on the Philippines. Soon after, Japanese forces invaded the islands, along with Wake Island and Guam. Then came offensives into Burma, pushing British and Chinese forces back. In February 1942, Singapore fell. The Allied navies lost several battles against the Imperial Japanese Navy, including the Battle of the Java Sea in late February. In March and April, Japanese naval forces raided the Indian Ocean. In May, the last American defenders in the Philippines surrendered at Corregidor, and the influence of the Japanese extended as far south as Australia, which would be bombed numerous times in 1942.
In spite of these resounding successes, the Allies had not yet capitulated and continued to resist against the Japanese. The decisive engagement for which the Imperial Japanese Navy (IJN) had long believed was the desired means to achieve a victory against its primary opponent, the US Navy, had not yet occurred. Thus, given the situation, there were several options available to the IJN. One option was to switch from a offensive to defensive position in order to consolidate the gains which the Japanese had made in the previous six months. This option was supported by Rear Admiral Ryunosuke Kusaka, the chief of staff for Vice Admiral Chuichi Nagumo’s carrier force. Another option favored by the Navy was an invasion of Australia, with either the occupation of some or all of the country. This option was quickly dismissed by the Army, which assessed that that mission could only be accomplished by the commitment of 10-12 infantry divisions.[1]
A third option, the most risky, was put forth by Admiral Isoroku Yamamoto, the commander of the Combined Fleet of the IJN. Yamamoto was and remains a legendary figure in the IJN. Architect of the IJN’s potent carrier force known as the Kido Butai and the attack on the Pearl Harbor, he was also controversial for many of his decisions in the 1930s, which had made him a target for assassination by certain elements of the military and government. He proposed a major operation to attack Midway Atoll, a group of islands roughly equidistant between North America and Asia, and approximately 1,000 miles northwest of Hawaii. Yamamoto believed that such an action would compel the US Navy to commit its forces, since Midway was too close to Hawaii to ignore. The Naval General Staff believe that the operation was far too risky- Midway was extremely far from Japan, and occupying the islands would prove a logistical headache. However, by April 5th, Yamamoto had won over the General Staff to his idea.

Midway Atoll consists of two islands and until the mid-19th Century was uninhabited. Located approximately 1,000 nautical miles west of Hawaii, Midway had served as a fueling stop for trans-Pacific flights from Pan Am. In 1940, the US military began developing the islands as a base, recognizing the strategic placement of the islands. Photo: Wikipedia.
Operation MI, Yamamoto’s plan, reflected Japanese pre-war belief that a set-piece battle was the key to their victory in the Pacific. It was tremendous in scope and extremely ambitious- it also carried significant risks. The decisive battle which pre-war Japanese planners had built their ideas around featured the use of submarine, destroyer, and cruiser attacks to cut down US forces to size before Japanese battlewagons would engage and defeat the US battleships in the climax. Accordingly, Yamamoto’s plan was designed to draw out US carriers from Hawaii in order to destroy them- it was a complex plan involving a large number of Japanese warships.
The main force was built around the Kido Butai, commanded by Vice Admiral Chuichi Nagumo, the same admiral who had been in command of the IJN’s successful naval aviation operations for the past six months, including the attack on Pearl Harbor. The Main Force was to include six aircraft carriers, two battleships, two heavy cruisers, one light cruiser, and 11 destroyers. Yamamoto’s plan first called for the seizure of Kure Island on June 5th, positioned 60 miles west of Midway, to establish a seaplane base. Landings on Midway itself were scheduled for June 6th- the landing force was to consist of 12 transports escorted by 3 patrol boats, one light cruiser, and 10 destroyers- 5,000 troops were assigned the task of taking the islands. The Invasion Force, operating in support of the landing, included two battleships, four heavy cruisers, eight destroyers, and a light carrier. [2] Once landing forces had taken control of the islands, they were to emplace a number of anti-aircraft guns and land a large number of fighters. An additional portion of the operation was Operation AL, the Japanese offensive into the Aleutian islands. It has been conventional wisdom to assume that this was an attempt at a diversion, but in actuality it was just a portion of the larger Operation MI. The intent of Operation AL was to seize two islands- Adak and Kiska. Dutch Harbor would be hit with an air raid on June 3rd, while landings would occur on June 6th. Two smaller carriers, the Junyo and Ryujo with 63 total aircraft between them would support Operation AL. These carriers would be escorted by two heavy cruisers and three destroyers under the overall command of Hosogaya Moshiro. The Invasion Force in the Aleutians was composed of three light cruisers, seven destroyers, three transports, and several auxiliaries. Further to the south was the Guard Force, intended to respond against local US counterattacks- this consisted of four battleships, two light cruisers, 12 destroyers, and two oilers.[3] Finally, as a prelude to the operation against Midway, two flying boats would fly first to French Frigate Shoals, would reconnoiter Pearl Harbor to determine the presence of US carriers.[4]
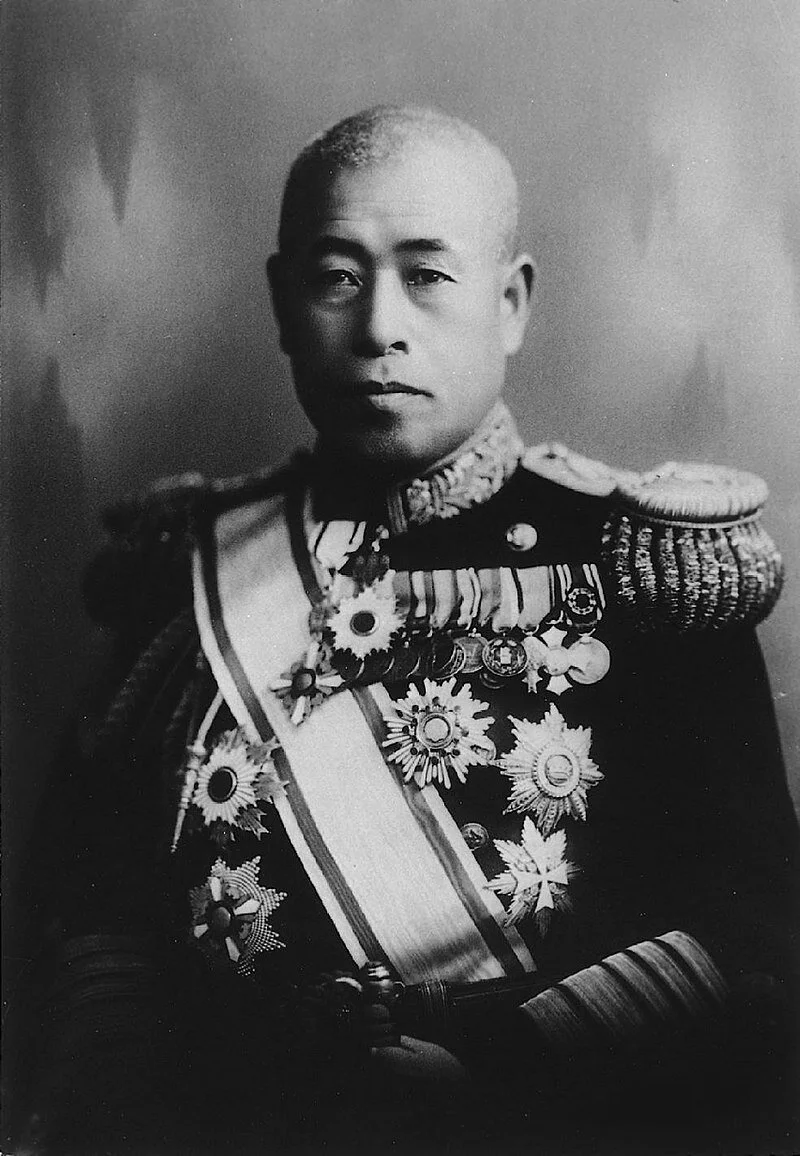
Admiral Isoroku Yamamoto was an icon among the Imperial Japanese Navy by the time which the Battle of Midway occurred. However, his forcefulness in pushing for his plan to engage the US Navy at Midway would prove disastrous. Photo: Wikipedia.

Vice Admiral Chiuchi Nagumo had been in service in the IJN since 1908. Despite the fact that nearly all of his career had been spent in surface ships, he had been appointed to command the IJN’s carrier force prior to Pearl Harbor. Photo: Wikipedia.
This plan followed IJN doctrine, which called for destroyer and cruiser attacks to cut US forces down to size, allowing the Japanese battleships to decisively engage US battleships in a final climatic battle. Additionally, concentrating its carrier force into the main body allowed the Japanese to mass its aerial combat power against the US Navy, which to the best of Japanese knowledge was by the time of the battle reduced to just two operational carriers in the Pacific. However, the Japanese plan had numerous flaws. First, it discounted the fact that the IJN’s carrier force was worn out, having been in the midst of near-constant operations for the past six months. Air crew, mechanics, and the sailors were tired and in need of rest. There were problems with aircraft manufacturing; at the time, the IJN was beginning to introduce the Aichi D4Y dive bomber to replace the aging D3A ‘Val’. The D4Y was a significant improvement over the older dive-bomber, but only a few of the newer aircraft equipped the fleet, and Aichi was not providing sufficient spares to maintain the older fleet of dive-bombers. Additionally, the entire Kido Butai’s (the Japanese term for the core of aircraft carriers) strength of aircraft had been reduced by 16% since Pearl Harbor.[5] A hugely impactful piece of news came a month before the Midway operation, at the Battle of the Coral Sea. Here, the Japanese had lost the light carrier Shoho, while the fleet carrier Zuikaku was damaged and the fleet carrier Shokaku’s air complement was effectively wiped out in the course of the battle. This meant that the Kido Butai would have to do without these two fleet carriers at what was supposed to be the decisive engagement against the US Pacific Fleet. Finally, Japanese plans were based on the assumption that the Americans would be reacting to Japanese actions, rather than anticipating them. In reality, nothing could be further from the truth.
US Naval Intelligence had been working ceaselessly since Pearl Harbor to determine Japanese future intentions in the Pacific. Among the many disciplines utilized by the US Navy was cryptoanalysis, which attempted to decipher coded Japanese messages. Numerous listening posts were emplaced throughout the Pacific, perhaps none more substantial than what came to be referred to as Station Hypo. Hypo was actually put into place prior to the attack on Pearl Harbor- in June 1941, the station chief who was in command in the months prior to Midway arrived- Commander Joseph Rochefort. Rochefort was born in 1900 and joined the Navy at age 17 as an enlisted sailor during the First World War. Beginning as a electrician 3rd class, he was commissioned into the reserve as an engineer. In 1921, he transferred to the regular Navy. Four years later, he had his first experience with cryptoanalysis when he was sent to the Navy Department in Washington, D.C. For the next 14 years, he served in various positions, including a three-year stint in Japan.[6] Hypo, despite being a receptacle for potential intelligence, was quartered in the basement of a run-down building, as described by Max Hastings:
“Station Hypo… was quartered in the echoing, unlovely basement of the Navy Yard administration building, entered through a time-locked unmarked door guarded by Marines. ‘The Dungeon’, as it was dubbed by its inmates, looked like a small-town pool hall, even unto the chronic smoke haze, because everybody worked with a cigarette stuck in his mouth.”[7]
Despite the rudimentary building, Hypo grew quickly. In September 1941, 23 personnel were assigned to the post. By April 1942, there 40 officers and 100 enlisted personnel working around the clock. Rochefort himself worked on a 24-hour on and 24-hour off schedule with a counterpart. However, even with this increase in personnel, the cryptanalysts were hard-pressed to decipher even a fraction of what they received. Typically on a daily basis, Hypo intercepted between 500-1000 messages a day, which represented about 60% of all Japanese radio traffic.[8] Of this Hypo personnel could only analyze 40% because of time and personnel restrictions. Of this further reduced amount, the cryptanalysts could only successfully decipher 10-15% of messages.[9] However, authors Jonathan Parschall and Anthony Tully noted in their book Shattered Sword: The Untold Story of the Battle of Midway that even this amount, coupled with analysis of radio traffic allowed the American cryptanalysts to gain some sense of what messages were important.[10]

Lieutenant Commander Joseph Rochefort commanded Station Hypo and oversaw the Navy’s cryptographic interception and analysis of Japanese messages. Considered by some of his colleagues as eccentric, Rochefort’s contribution made the US victory at Midway possible. Photo: Wikipedia.
The hard work of Rochefort and his team’s hard work finally paid off in the spring of 1942. Beginning in April, Rochefort began seeing an increase in radio traffic with the Japanese naval code, referred to as JN-25, along with specific references to an operation, referred to in the coded messages as Objective ‘AF’. Rochefort suspected that the operation’s objective was Midway. To confirm the suspicions of Rochefort and his analysts, an idea was hatched to get the Japanese to confirm this information. A message was sent to the base on Midway directing them to send a plain-language message via radio to Pearl Harbor that Midway’s water distillation plant was malfunctioning. On May 20th, Hypo intercepted a message that confirmed the analysts’ suspicions- the Japanese had reported Midway’s supposed problem to higher headquarters. Rochefort reported Hypo’s findings to Admiral Chester Nimitz, the Commander in Chief of the Pacific Fleet. In the intervening time, Rochefort had even managed to identify specific ships attached to the operation. Unfortunately, shortly after Rochefort made his report, the Japanese changed their codes to an alternate version of JN-25, which had the effect of temporarily cutting off additional message traffic. In spite of this, Nimitz decided to act on Rochefort’s intelligence.[11]
Nimitz’s plan was not a gamble, as it has been considered by some historians, but rather a calculated risk based on the intelligence he had on hand. He placed his task force, split into two elements, north of Midway in a position to ambush the Japanese Main Body force when it arrived. The first consisted of the USS Hornet and USS Enterprise along with its escorts, under the command of Admiral Jack Fletcher. Pearl Harbor dock workers also managed to get the USS Yorktown, damaged at the Battle of the Coral Sea in May, repaired enough in time to put to sea and join the other task force north of Midway. Commanding the Yorktown was Admiral Jack Spruance, who was taking charge in place of the ill Admiral William Halsey. The combined airpower among all three US carriers was 233 aircraft, just fifteen less than the Japanese.[12] Additionally, Midway itself had been heavily reinforced with both aircraft and ground forces. Thirty-one PBY Catalina patrol aircraft provided reconnaissance to cover the approaches to the island. Seventeen B-17 heavy bombers and four B-26 medium bombers equipped to drop torpedoes rounded out the Army Air Forces’ reinforcements to the island. Additional Navy and Marine aircraft included: nineteen SBD “Dauntless” dive bombers, twenty-one old SB2U “Vindicator” dive-bombers, twenty-one Brewster “Buffalo” fighters, seven F4F “Wildcat” fighters, and six of the brand-new TBF “Avenger” torpedo bombers. All told, this amounted to 127 aircraft on Midway itself. Further complicating matters for the Japanese were the ground forces on the atoll: the Sixth Defense Battalion commanded by Colonel Harold Shannon, two companies of Marine Raiders, a platoon of Stewart light tanks on Sand Island, booby traps, barbed wire, trenches, and gun emplacements. All of this made Midway a considerable obstacle for the Japanese.[13]

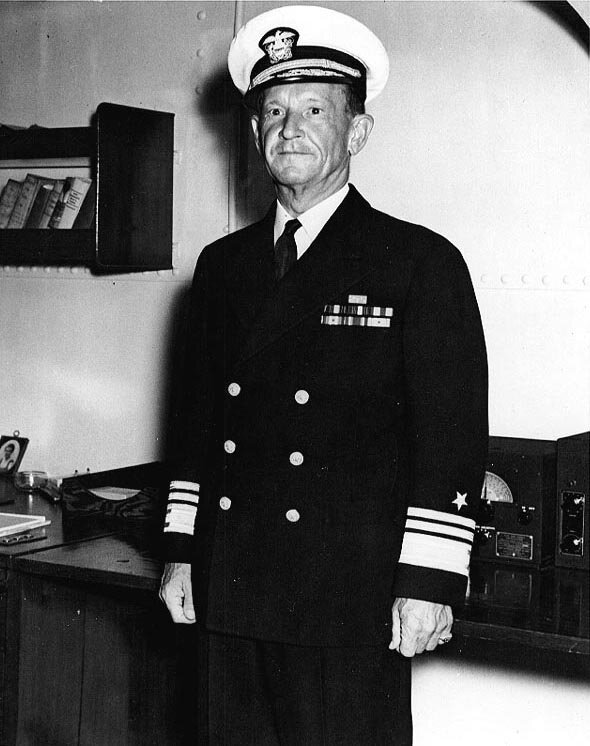
Admiral Chester Nimitz made a calculated risk when he came up with the plan to ambush the IJN at Midway. Nimitz was under considerable pressure from Washington to ignore the analysis which Station Hypo had been providing. In spite of this, Nimitz went forward with his plan. Photo: Wikipedia.
Admiral Jack Fletcher, like Nagumo, had served most of his naval career in conventional warships. He took command of Yorktown on January 1, 1942 and served under Vice Admiral Bull Halsey for the first six months of the war, gaining much experience in carrier operations. Photo: Wikipedia.

Admiral Raymond Spruance had had no experience in carrier operations before the Battle of Midway, though his cruisers were responsible for their escort during the first half of 1942. However, on Halsey’s recommendation, Spruance became commander of a task force including the Enterprise and Hornet. Later in the war, Spruance commanded the Fifth Fleet in some of the largest carrier operations in history. Photo: Wikipedia.
However, the Japanese were not aware of these developments, and on May 27, 1942 the Kido Butai sortied from Japan. American PBY flying boats carried out their searches for days; at 0843 on June 3rd one of the PBYs located the IJN’s Minesweeper Group. Less than an hour later, another PBY spotted the Transport Group, 700 miles west of Midway. The first exchanges of fire actually occurred on the 3rd; at 1200, nine B-17s attacked the transports without scoring any hits. Another raid took place that night; at 0130 on the 4th, four radar-equipped PBYs attacked the Transport Group with torpedoes, scoring a hit on the tanker Akebono Maru and killing 23 crewmembers. Despite the damage, the tanker was able to keep its place in the convoy.[14]
Later that morning, 108 Japanese aircraft took off to strike Midway under the leadership of Lieutenant Tomonaga Joichi, the air group commander from Hiryu. Another seven aircraft were launched from escorting cruisers to provide early warning to the Kido Butai about the approach of US ships. However, as author Jonathan Parschall points out in his book Shattered Sword, these seven aircraft had to scout an area the size of Sweden and had to hope for perfect weather.[15] Complicating this problem was that two of the scout aircraft were late in taking off.
While the Japanese strike force headed towards Midway, nearly all of the American planes on the atoll were also getting airborne. Twenty-two of the PBYs were conducting searches, all of the B-17s and B-26s had gotten airborne, along with sixteen Dauntlesses and eleven Vindicators. Additionally, once US radar detected the incoming Japanese planes, six Wildcats and eighteen Buffaloes from VMF-211 were scrambled to intercept.[16] At 0620, the American fighters attacked the Japanese planes, some 30 miles from Midway. Somewhat predictably, the American fighters, in particular the woeful Buffaloes, suffered heavily against the Japanese fighter escort. Thirteen Buffaloes and two Wildcats were shot down. [17] Still, the Americans managed to shoot down two B5N “Kate” level bombers and an A6M2 “Zero” fighter.[18] More notably, the Japanese took additional losses at the hands of Midway’s anti-aircraft defenses. Another two Kate level bombers, one D9A “Val” dive-bomber, and another Zero were shot down.[19] A large number of Japanese aircraft were also hit; fourteen were heavily damaged and twenty-nine had been damaged to some degree- nearly a quarter of the strike force had been either lost or damaged in the raid. Twenty aircrew had been killed or were missing, and several more were wounded.[20] Additionally, the raid failed to put Midway out of action- a number of buildings had been set afire, but the runways remained operational and most of the US aircraft had not even been present at the time of the raid.

Oil tanks burn following the Japanese strike on Midway. Filmmaker John Ford filmed the attack, despite being wounded by shrapnel, and later released the footage as part of a short documentary. Photo: Wikipedia.
In the meantime, the Americans had found the Japanese carriers while their strike force had still been en route to Midway. Accordingly, both the Hornet and Enterprise had launched their aircraft to attack the Japanese carriers by 0800. Yorktown would launch its aircraft by 0900.[21] For hours that morning, the Japanese carriers were under sustained aerial attack by US aircraft. The first group of attackers came from Midway- all six Avengers and all four B-26s attempted torpedo attacks on the carriers. However, the Zeroes which were on Combat Air Patrol (CAP) pounced on the American aircraft; only two Avengers and one B-26 managed to launch their torpedoes; five of the Avengers and two B-26s were shot down. At 0800, sixteen Dauntlesses from VMSB-241, commanded by Major Lofton Henderson, attempted glide-bombing attacks on the carriers but were met by nineteen Zeroes. Eight of the Dauntlesses were torched, though one Zero was also shot down; again, the Americans failed to achieve any hits. Next, fourteen B-17s attempted a level bombing attack from high altitude- they managed some near misses, but again had no hits. The final group of aircraft from Midway to attack was eleven Vindicators; three were shot down with no damage inflicted on the Japanese ships.[22]

The Hiryu maneuvers as a stick of bombs from B-17s lands nearby. Photo: Wikipedia.

The six Avengers of VT-8 come under attack by A6M Zeroes on CAP. Painting: “Only One Survived” by Craig Kodera.

In a dramatic moment not captured in the film, one of the B-26s, piloted by Lt. James Muri, flew directly down the length of Akagi’s flight deck after dropping its torpedo. Painting: “Marauder at Midway” by Jack Fellows.
It was at this point that several factors began to influence Nagumo. Following the return of the strike force aircraft, Lt. Tomonaga had advised him to make a second strike on Midway. Nagumo now made the critical decision to disobey Yamamoto’s standing order to keep half of his aircraft armed to attack ships and rearm all aircraft with bombs for hitting Midway. Just 30 minutes after this choice, one of the late-launching scout planes reported sighting a US carrier; Nagumo now ordered that his aircraft be rearmed with torpedoes. These planes were ready by 0815, but because the Japanese carrier force was under near-constant aerial attack by US planes, the fighters on CAP had to land, refuel and rearm, then take off again.[23] At approximately 0830, the US carrier planes began attacking.
Among the first groups to attack was the Hornet’s VT-8, consisting of fifteen slow TBD “Devastator” torpedo-bombers. This squadron soon became infamous as all fifteen aircraft were shot down; only Ensign George Gay, a pilot, survived. An hour later, the Enterprise’s VT-6, with fourteen TBDs attacked. Nine of these aircraft were shot down outright and another plane ditched because of battle damage. The sum result of these costly attacks, which had again failed to cause any damage, was that Nagumo had been forced to reverse his carrier’s course to avoid torpedoes, taking it out of the wind and making it impossible to launch or recover fighters.[24] At 1010, the last torpedo attack began as Yorktown’s air group began arriving over the Japanese carriers. Unlike previous torpedo attacks, VT-3’s TBDs were escorted by six Wildcats. Despite being engaged by twenty Zeroes, the Americans faired much better- only one TBD was shot down, along with a Wildcat, while five Zeroes were shot down.[25] This final attack had drawn even more of the Japanese fighter cover to lower altitudes, chasing after surviving American planes.

The TBD ‘Devastators’ of VT-8 on the flight deck of Hornet prior to launch at Midway. Photo: Wikipedia.
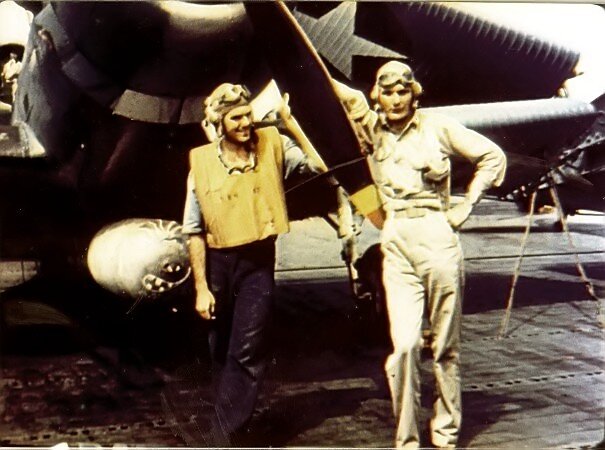
Ensign George Gay (right) was the only survivor of VT-8’s attack on the Kido Butai. His gunner, Robert Hunnington (left), was among those killed during the attack. Photo: Wikipedia.
The Japanese position was made worse by the state of Japanese carrier defenses. None of the IJN carriers present at Midway were equipped with radar, which meant they had to wait for enemy aircraft to close to within visual range before engaging with either fighters or anti-aircraft fire. The carriers had outdated AA armament as well, with a mix of 8-inch guns (which could not elevate to fire at dive-bombers overhead), 4.7-inch guns, and twin-25mm cannons. Additionally, these guns could only fire time-fused shells, not proximity shells like the Americans used.[26] Compounding these issues were equally outdated fire directors controlling the AA guns- the Type 91 fire director dated to 1931 and could not accurately track newer aircraft. Consequently, a typical Japanese response to enemy aircraft overhead was to throw up a barrage or hold fire until enemy aircraft were at a dangerously close range.[27]
It was at this crucial point that the dive-bombers from Yorktown and Enterprise entered the fray. Arriving on the scene at 15,000 ft above the Japanese carriers, they met no fighter opposition. Chance had led the Enterprise’s aviators to the fleet; running low on fuel, their commander had spotted a Japanese destroyer returning from depth-charging the submarine USS Nautilus; making her best speed, the destroyer was speeding back towards the Kido Butai, and in the process led the American flyers straight to the carriers. At 1025 both VB-3 from Yorktown and VS-6 and VB-6 from Enterprise attacked. Yorktown’s pilots attacked the Soryu, scoring three hits with 1,000-lbs bombs. Nearly the entirety of Enterprise’s pilots concentrated their efforts on Kaga, hitting her with at least four 1,000-lbs bombs. Seeing that there were other carriers to be bombed, a three-plane section led by Lieutenant Richard Best broke off and targeted the Akagi- only Best scored a hit with his 1,000-lbs bomb, but it turned out to be a critical hit.[28] Leaving the three carriers in flames, the Dauntlesses beat a hasty retreat before the Zeroes could recover in time to shoot them down. Only two SBDs from VB-6 were lost in the attack. Following this shattering attack, a final torpedo attack was made by a dozen TBDs; ten were lost to Zeroes and AA fire.
On board the stricken Japanese carriers, the situation could not have been much worse. With their hangar decks crammed full of aircraft loaded with torpedoes, secondary explosions were inevitable. The IJN had not placed a priority on damage control training, relying instead on fire extinguishing systems. Ideally, fans would expel dangerous fumes and foam spraying from overhead pipes and wall nozzles would be sprayed onto the fires. Additionally, there was only a single emergency generator to provide power for the damage control parties.[29] In the case of the Akagi, Best’s hit had knocked this system out, killing the power not only to pumps and fans, but also breaking the foam extinguisher pipes. Eventually, the fires grew in size and caused aviation fuel vapors to ignite, turning the carrier into an inferno. These problems were also experienced by the Soryu and Kaga. Ultimately, Soryu sank that evening with the loss of 711 officers and men. Kaga and Akagi would take longer to sink, but shared the same fate, losing 811 and 263 officers and men respectively.[30]
In R.G. Smith’s “Battle of Midway” painting, SBDs from the Enterprise and Yorktown pull out of their dives after achieving hits on three of the Japanese carriers.

John Hamilton created a series of paintings depicting the Battle of Midway, including this one, titled “The End of Akagi”.
Despite the loss of three carriers and nearly all of the aircraft on them, Vice Admiral Tamon Yamaguchi, captain of the Hiryu, was still determined to continue fighting, believing that he was facing only 1, perhaps two US carriers. Yamaguchi was left with ten Zeroes, eighteen Vals, eight Kates, plus twenty-seven Zeroes which remained on CAP. He struck back relatively quickly, launching eighteen Vals and six Zeroes. En route to their target, the escorting Zeroes abandoned their charges to attack six US aircraft- two Zeroes had to turn back with damage. US fighters conducting CAP shot down seven Vals immediately; another two were downed before the strike force reached the carrier. The remaining dive bombers conducted their attack effectively on the Yorktown; they placed three hits with 550-lbs bombs and two near-misses onto the carrier. However, they lost two more Vals and three Zeroes while exiting the area- only five Vals and three Zeroes managed to return from this attack.[31] At 1245, a last attack from the Hiryu was launched; this strike force was cobbled together from the remnants of the first attack, remaining CAP fighters, and other carriers. Ten Kates and six Zeroes attacked the US forces once more. The Yorktown, which had again recovered from battle damage, was the subject of this attack as well. Wildcat fighters on CAP shot down five of the torpedo bombers, including the flight leader (Tomonaga) at the cost of two Wildcats shot down. The remaining Kates scored two torpedo hits on Yorktown. Just five Kates and four Zeroes returned from this mission.[32]
When this second strike force returned, Yamaguchi planned to launch one more attack at 1800 with four Vals, five Kates and nine Zeroes; this was not to be. Dive bombers from both the Yorktown and Enterprise took off; the Japanese detected them only four minutes before the Dauntlesses began their dive, and thus experienced no fighter opposition. They hit the Hiryu four times with 1,000-lbs bombs, losing three Dauntlesses to Zeroes in the process. Beset with the same problems as her sisters, Hiryu would sink on the morning of the 5th with the loss of 383 officers and men- 35 were captured after they were left behind by other Japanese ships.

Yorktown burns following a pair of bomb hits. Photo: Wikipedia.

Flak bursts surround the Yorktown, and several Japanese planes are visible in the background, while a torpedo detonates against the side of the carrier. Photo: Wikipedia.
With the Kido Butai wiped out, any hope of taking Midway vanished. Yamamoto, accepting responsibility for his role in the disaster, initially entertained the idea of rushing his battleships forward to try and engage the American ships with gunfire. Ultimately, he decided against this and ordered his forces to begin withdrawing. The battle was not yet over though. All through the 5th, US carrier and ground-based aircraft continued attacking Japanese ships. Initially, they had little success and lost two B-17s and two Dauntlesses in the process. However, on the morning of the 6th, US planes were successful in attacking a group of four Japanese warships. The previous morning, the heavy cruisers Mogami and Mikuma had collided, damaging both; two destroyers were provided to escort the cruisers back towards safe haven. In several attacks through the day, Mikuma took five bomb hits, turning into a flaming wreck; she would sink on the evening of the 6th with the loss of 700 crew. The destroyer Arashio was hit by a bomb, killing 37 sailors, and American planes strafing the destroyer Asashio killed another 22 sailors. Mogami was also hit by a bomb, which killed 90 and wounded over 100.[33]
While US planes were continuing to attack the retreating cruisers, the Yorktown defiantly remained afloat. The destroyer Hammann came alongside to provide support to the skeleton crew attempting to save the ship. However, just when progress to get the heavily-damaged carrier was gaining traction, the Japanese submarine I-168 spotted the two ships and fire four torpedoes. One torpedo hit the Yorktown, while the other cut the Hammann in half. This proved to be too much for the Yorktown, which finally sank late that day.[34]

Hiryu continues to smolder on the morning following the strikes on the Japanese carrier force. By this point, the Hiryu had long been dead in the water and was abandoned. Photo: Wikipedia.

In one of the more famous images from the battle, SBDs fly high over the burning Mikuma, preparing for another bombing attack. Photo: Wikipedia.

The IJN Mikuma continues to burn and list in this picture from a passing US aircraft following the strikes on June 5th. Photo source: Wikipedia.

In this picture taken by a member of the skeleton crew aboard the Yorktown, the destroyer Hammann sinks following two torpedo hits. Crew members can be seen abandoning ship. Photo: Wikipedia.
Japan’s effort to take Midway and decisively engage the US Pacific Fleet, a risky gamble from the start, had ended in catastrophe. The IJN had lost four carriers, along with 248 aircraft, and a heavy cruiser. Some 3100 sailors, aircrew, and aircraft mechanics and technicians were killed, all losses which were effectively irreplaceable given the level of experience that the IJN had had at that time.[35] The death of 721 mechanics and technicians was especially hard-felt. The victory had not come cheaply for US forces, which had lost a carrier, a destroyer, 144 aircraft, and 362 sailors, Marines, and airmen killed.[36]
The Battle of Midway was a decisive battle in the Pacific War. It did not end the Japanese’s ability to wage war, as the IJN more than aptly proved numerous times in the Guadalcanal campaign. However, Midway did stop the Japanese string of victories which had marked the first six months of the war. It effectively took the initiative away from the Japanese and forced them to adopt a defensive posture while they licked their wounds and tried to begin recovering. For the US, the victory was a blinding success which handed them the opportunity to go on the offensive. It also showed to many Americans that the Japanese were not the invincible masters of the Pacific which the war thus far had led many to believe. Finally, if Pearl Harbor had not shown the devastating potential of naval aviation, Midway had demonstrated beyond a shadow of a doubt how the method by which the US would eventually dominate the theater- the use of massed naval aircraft.
Most of the Japanese leaders in this battle would not survive the war. Less than a year after Midway, Yamamoto was dead, killed in April 1943 over Bougainville by P-38s while conducting an inspection tour; he had again been a victim of naval intelligence, which had intercepted his plans. Vice Admiral Chuichi Nagumo continued to command carriers for a short period during the Guadalcanal campaign, before being reassigned to shore duty; he ultimately committed suicide in the waning days of the battle on Saipan. Rear Admiral Tamon Yamaguchi chose to go down with the Hiryu. One officer who did survive was Mitsuo Fuchida, who had led the raid on Pearl Harbor. Recuperating from an appendectomy prior to the battle, Fuchida was wounded during the battle. He would later write a book about his perspective on the battle, but many of his claims have since been disproven.
Among the major American commanders, Admiral Chester Nimitz continued to command the Pacific Fleet through the remainder of the war, and remains perhaps the most famed admiral in the history of the US Navy. Admiral Jack Fletcher continued to command carrier forces during the first months of the Guadalcanal before moving on to various shore commands. Raymond Spruance became Nimitz’s chief of staff for about a year, then commanded various fleets during operations from late 1943 onwards, including the pivotal Battle of the Philippine Sea. However, one figure in the Midway battle did not receive recognition or promotion. Joseph Rochefort was not well-liked by many of his superiors; Nimitz recommended him for a Navy Distinguished Service Medal, but Chief of Naval Operations chief of staff Admiral Russell Wilson denied the award. Reassigned to command a floating dry dock in San Francisco in October 1942, he never served at sea again. Nine years after his death in 1976, Rochefort was posthumously awarded the Navy Distinguished Service Medal for his crucial breakthrough leading to the victory at Midway.
The Film
Midway is the second film to address the pivotal 1942 battle. In 1976, Universal Pictures released Midway, which starred Charleton Heston and Henry Fonda, with a number of other notable actors in supporting roles. This film made extensive use of footage from the several other movies (1970’s Tora Tora Tora, 1944’s Thirty Seconds Over Tokyo, and 1960’s Hawai Middouei daikaikusen: Taiheiyo no arashi), along with archival footage- with mixed results. The film also makes little to no mention of the Midway air group’s attacks, and shoehorns a cliché love story into the plot. A for-TV version produced even more soap-opera storylines with another love sub-plot between Garth and a woman who attempts to get him to settle down. Adding insult to injury is the fact that the Japanese actors are speaking English, which certainly interferes with the audience’s suspension of disbelief.
The new Midway film is superior in nearly every way to the old movie. While the old Midway film had used its main actor, Charleton Heston, to play the fictional character of Matt Garth, the lead actors of the film all portray very real participants in the battle. Midway is primarily told from the perspective of the Enterprise’s air group. Ed Skrein portrays Lieutenant Richard Best, commander of a dive-bombing squadron. Other actors include Patrick Wilson as Lieutenant Commander Edwin Layton, Rochefort’s immediate supervisor, Luke Evans as Lieutenant Commander Wade McClusky, Aaron Eckhart as Lieutenant Colonel Jimmy Doolittle, Woody Harrelson as Admiral Nimitz, Dennis Quaid as Admiral Bull Halsey, Jack Weber as Admiral Spruance, and Luke Kleintank as Lieutenant Clarence Dickinson. Among the actors portraying the Japanese are Tadanobu Asano as Rear Admiral Tamon Yamaguchi, Etsushi Toyokawa as Admiral Isoroku Yamamoto, and Jun Kunimara as Vice Admiral Chuichi Nagumo. While the 1976 movie used models or archival footage of the actions scenes, the new film relies heavily on CGI to recreate the battle. While 15 years ago this would have possibly been executed poorly, it’s hard not to marvel out how much attention to detail was made in recreating the battle scenes as accurately as possible. The movie did not make use of any actual aircraft; possibly this was done for budgetary reasons, or because the remaining aircraft that do exist represent models which flew after Midway took place. Instead, the studio built replicas of Dauntless and Devastator aircraft for the actors to use in carrier flight deck scenes.

Lieutenant Richard Best was one of the principle characters of the Midway film. Photo: Wikipedia.
The new Midway film also does a far better job of explaining the background of the Midway battle to audiences; I was actually surprised and impressed with the extent to which the producers went to show the various campaigns that the Enterprise and other elements of the US military went through prior to Midway, including the raid on Pearl Harbor, the US raids on various Japanese outposts in February 1942, the Doolittle Raid, and the Battle of the Coral Sea. All of these battles are shown as shaping events to the Battle of Midway itself. One intriguing choice by the filmmakers was the decision to focus on LTC Layton rather than Rochefort. Layton, the primary intelligence officer on Nimitz’s staff, was not one of the codebreakers who actually intercepted and interpreted the messages which Station Hypo decrypted. However, as Nimitz’s intelligence officer, it was his responsible for taking into account all of the information he had available to him and make an assessment based on that information. In this view, while Rochefort perhaps had the biggest impact on the battle, it was Layton who presented Rochefort’s intelligence and his own assessment to Nimitz.
As far as the actual portrayal of the battle, the film is generally accurate. There are some very minor details which are incorrect- some examples include the portrayal of far more B-26s than were actually involved in the battle, TBDs carrying both torpedoes and bombs, more Dauntlesses are shown being shot down diving on the carriers than were actually lost, and both aircraft and ships are shown far closer together in formations than they would have been in actuality. Strangely, unlike the 1976 film, there is no depiction of Grumman Wildcats which played an important role in both providing an escort to some of the bombers as well as Combat Air Patrol over the fleet, downing several Japanese aircraft. Another detail incorrectly shown throughout the movie is the altitude at which the Dauntlesses released their bombs, which is shown to be much too low in the film- in reality, the aircraft would have released significantly higher to avoid crashing into the sea while pulling out of their dive. A perhaps not as-minor detail which is incorrect is the idea that the Japanese would invade the US west coast successfully in the wake of a US Navy failure. While the IJN was indeed a formidable force, the Japanese could not have realistically carried out a successful invasion of the western United States. Already deeply involved in the war in China for years, the Japanese Army would have been stretched beyond its limit in the event of an invasion. The IJN could also not have supported such as invasion successfully, which Admiral Yamamoto near perfectly well. However, on the whole the movie gets the actual flow of events correct. Some details are even depicted which audiences may believe to be fictional but were in fact truth; Bruno Guido’s shootdown of a Japanese bomber, which cut the tail of the Dauntless he was sitting in in half happened in reality. Guido’s execution by the crew of Japanese destroyer crew is also true- both he and his pilot were thrown overboard with weights tied to them. Another seemingly unlikely event which also occurred was the near-miss of a crashing B-26 which nearly hit the bridge of the Akagi; this aircraft was piloted by 1LT Herbert Mayes- the aircraft was hit by both fighters and anti-aircraft fire prior to crashing near the Akagi. On the whole, the movie is remarkably accurate- I struggle to think of a movie which has made as much of an effort to be true to history since 1970’s Tora Tora Tora.
There has been some criticism of the movie in that the filmmakers chose to primarily show the Enterprise’s air group’s role in the battle. There are positive and negative aspects to this decision. On one hand, some of the battle’s events are skipped- we don’t see the Yorktown being attacked repeatedly, and only see the carrier burning and sinking following the successful Japanese torpedo attack. The attacks on the Mikuma and Mogami are also not shown. However, it did provide a greater focus on the aircrew aboard the Enterprise, which ultimately became the most storied US warship of the Second World War.
Midway is certainly one the most true-to-the-events World War II movies to be released in many years. While the film uses a heavy amount of CGI to tell its story, CGI has progressed to a point where it closely resembles reality. If there is one major criticism I have for this movie, it is that some of the dialogue is perhaps a bit clunky. In spite of this, I highly recommend Midway for those interested in the subject- it is a very substantial improvement on its 1976 predecessor and it is a worthy retelling of the battle.
Sources
1. Parshall, Jonathan B., and Anthony P. Tully. Shattered Sword: The Untold Story of the Battle of Midway. Potomac Books, 2007.
2. Stille, Mark. Midway 1942: Turning Point in the Pacific. Osprey Publ., 2010.
3. O'Connor, Raymond, and David C. Evans. The Japanese Navy in World War II: in the Words of Former Japanese Naval Officers. Naval Institute Press, 2017.
4. Hastings, Max. The Secret War: Spies, Codes and Guerrillas 1939-1945. Harper Collins UK, 2016
5. Prados, John. Combined Fleet Decoded: the Secret History of American Intelligence and the Japanese Navy in World War II. Naval Institute Press, 2001.
6. Stille, Mark. The Imperial Japanese Navy in the Pacific War. Osprey Publishing, 2014.
[1] P.33- Shattered Sword: The Untold Story of the Battle of Midway
[2] P.35- Midway 1942: Turning Point in the Pacific
[3] P.35-37- Midway 1942: Turning Point in the Pacific
[4] P.122-The Japanese Navy in World War II: In the Words of Former Japanese Naval Officers
[5] P.89-90- Shattered Sword
[6] P.158-159- The Secret War
[7] P.159- The Secret War
[8] P.160- The Secret War
[9] P.60- Shattered Sword
[10] P.60- Shattered Sword
[11] P.160- The Secret War
[12] P.95- Shattered Sword
[13] P.96-97- Shattered Sword
[14] P.43- Midway 1942: Turning Point in the Pacific
[15] P.110- Shattered Sword
[16] P.43-Midway 1942: Turning Point in the Pacific
[17] P.44- Midway 1942: Turning Point in the Pacific
[18] P.323- Combined Fleet Decoded
19 p.204- Shattered Sword
[21] P.52- Midway 1942: Turning Point in the Pacific
[22] P.47-48- Midway 1942: Turning Point in the Pacific
[23] P.49-50- Midway 1942: Turning Point in the Pacific
[24] P.210- Shattered Sword
[25][25] P.56- Midway 1942: Turning Point in the Pacific
[26] P.58- The Imperial Japanese Navy in the Pacific War
[27] P.140-Shattered Sword
[28] P.57- Shattered Sword
[29] P.57- The Imperial Japanese Navy in the Pacific War
[30] P.58-59: Midway 1942: Turning Point in the Pacific War
[31] P.61-63: Midway 1942: Turning Point in the Pacific
[32] P.73- Midway 1942: The Turning Point in the Pacific War
[33] P.87-90: Midway 1942: The Turning Point in the Pacific War
[34] P.78: Midway 1942: The Turning Point in the Pacific War
[35] P.90: Midway 1942: The Turning Point in the Pacific War
[36]P.91: Midway 1942: The Turning Point in the Pacific War