The Tiger and the Sherman: A Critical Look
/
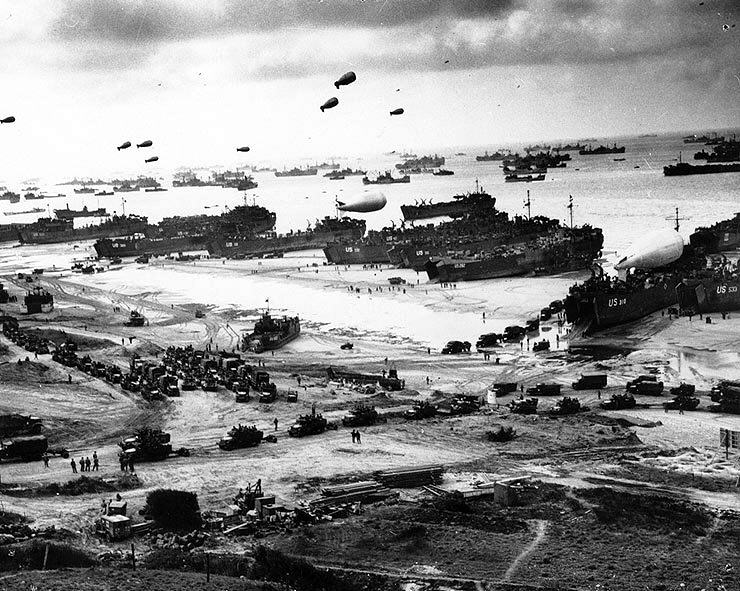
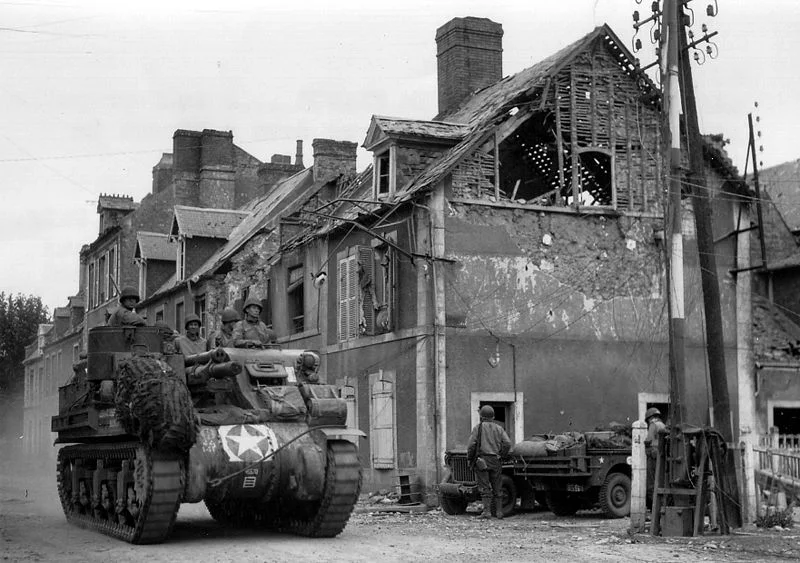
A British Sherman in action in Normandy shortly after D-Day. Photo source: Wikipedia.
Among the best known tanks of the Second World War, the German Tiger and the American Sherman tanks have since become icons of armored warfare and the subject of many a heated argument between enthusiasts of the subject.
By Seth Marshall
During the Second World War, dozens of tank designs were developed by all of the major combatants in the conflict, but few have been so readily identifiable with that war as the American Sherman medium tank and the German Tiger heavy tank. Both tanks have figured in multiple American films over the years; Kelly’s Heroes, Saving Private Ryan, and most recently, Fury, to name a few. Yet despite the many comparisons and arguments over these two vehicles, they could not have been more different. This article will attempt to separate the discussion of these two vehicles.
What would eventually become the Sherman medium tank had its origins in the 1930s with the development of the M2 and M3 medium tanks, which had been accepted by the US Army in 1939 and 1941 respectively. The M2 was an ungainly design that featured a 37mm gun mounted in a turret atop a pyramidal hull. Though unorthodox by contemporary standards, the M3 was a medium tank armed with a 75mm gun mounted in a side sponson built into the hull, and a 37mm gun mounted in a turret. While the M3 was reliable and easy to produce, its configuration was unorthodox- the gun mounted in the sponson soon proved to be too archaic, and the gun mounted in the turret proved to be too light to penetrate the armor of most contemporary medium tanks.
In 1940, the UK found itself short on tanks. Most of its heavy equipment had been abandoned in France during the German invasion, and British production was slow to compensate for the losses in armor. Consequently, the British found themselves receiving armor from the US via the Lend Lease Act. Around the same time, the US Army decided to redesign the M3 as a result of monitoring the Wehrmacht’s invasion of Western Europe. The new design shared many components with the older M3, a result of the Army’s design to keep as many components interchangeable between the designs as possible. The main gun from the M3, a 75mm L/40 was, placed in a rounded turret on the top of the hull. Space for the storage of 90 rounds for the main gun was made. Additionally, a Browning M1919A4 .30 caliber machine gun was mounted coaxially in the turret. A second .30 caliber machine gun was mounted in a ball mount at the front of the hull. There was storage for 4750 rounds, split between both guns. Providing anti-aircraft protection was a Browning M2 .50 caliber heavy machine gun, mounted on top of the rear of the turret- 400 rounds were provided for the M2. Powering the new tank was the Continental R975, a radial gas-powered engine originally designed for use in aircraft which produced 400 horsepower. The new tank had a range of approximately 120 miles. The main difference between the new tank, designated the M4 Sherman, was its upper hull, which deleted the sponson and featured a redesigned turret to accommodate the new gun.[1]
An M2 medium tank. Much of the Sherman's design was drawn from experiences with this tank. Photo source: Wikipedia.
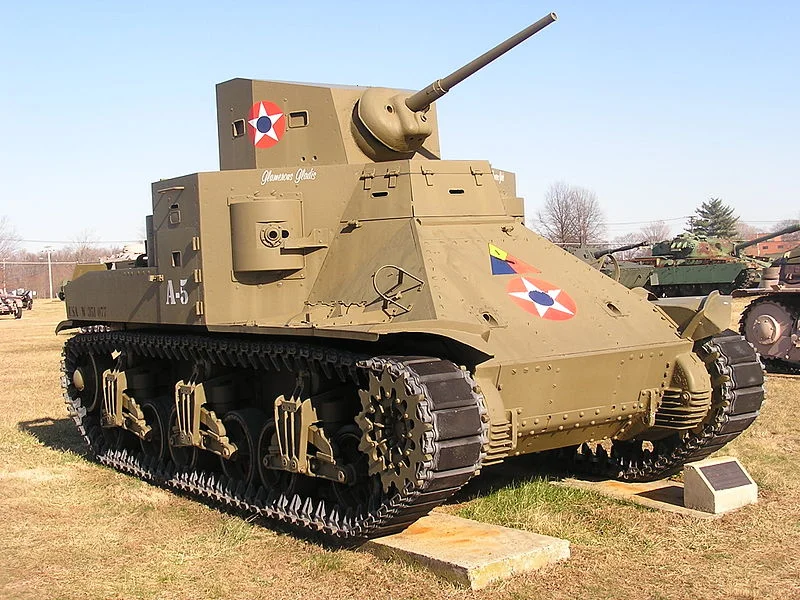
An M3 Grant medium tank, another tank that the Sherman traced its roots to. Unlike the M2, the M3 did see combat, though it had very limited success owing to design limitations. Photo source: Wikipedia.
The first Shermans produced were built by the Lima Locomotive Works, located in Ohio. These early Shermans featured a rounded upper hull, and many were delivered to the British and sent immediately to North Africa. Initially, M4s were produced at a rate of 1000 per month, though this quickly increased to 2000 a month.[2] Shermans in North Africa quickly proved their usefulness as a medium tank; at the Battle of El Alamein, some 400 Shermans were involved in the offensive, along with 650 other tanks. These tanks were pitted against some 400 Panzer IIIs and Panzer IVs.[3] Against these tanks, the Sherman proved successful. It was more than a match for the Panzer III, which was armed with a smaller gun and lighter armor, and was evenly-matched with early versions of the Panzer IV. However, the Sherman, with its 76mm thick front glacius plate, soon proved that it was incapable of withstanding shots from both the 75mm and 88mm German anti-tank guns.[4] The Sherman’s high profile made more visible to the German gunners, particularly in the deserts of North Africa. Nonetheless, the Sherman was destined to be a mainstay among the Allies.
Over the next two years, numerous variants of the Sherman were developed in an effort to improve its capabilities. The M4A1 was quickly superseded by the M4A1(76)W, armed with a improved 76mm gun, and perhaps more importantly, a damage control feature referred to as wet ammunition storage. Previous model Shermans were commonly known as “Ronsons” by the British and as “Tommy Cookers” by the Germans for their propensity to burn and explode when hit, owing in part to their vulnerable ammunition storage. The wet ammunition storage feature on M4A1(76)Ws included double-walled storage containers. The space between the walls were filled with water and ethylene glycol, to prevent freezing in cold weather. When penetrated by shellfire or shrapnel, the water between the walls would douse fires, preventing the tank from burning.[5] The M4A1(76)W was later replaced by the M4A3, the most common variant of the Sherman, and the one which would serve in the highest numbers in Western Europe. The M4A3 received a new engine, a liquid-cooled Ford V8 engine, providing 500-horsepower and a top speed of 30mph. Additional improvements included armored glass blocks added to the driver and bow gunner viewport.[6] However, these upgrade still left the tank vulnerable to high-velocity gunfire from German anti-tank guns and armored vehicles, among which was the Tiger I.

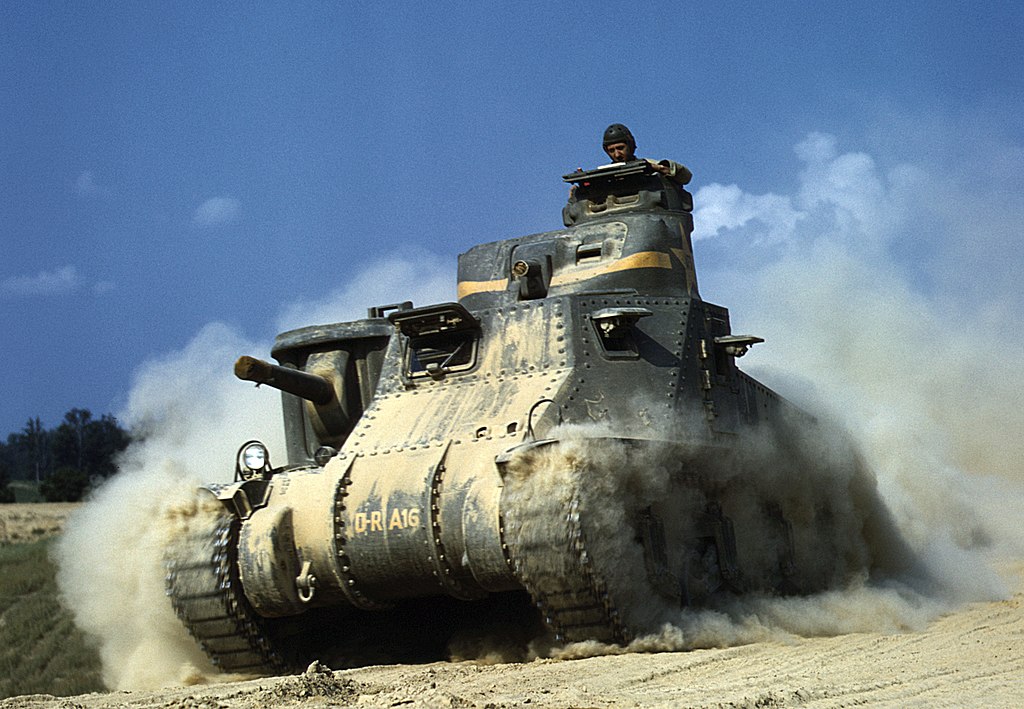
An M4A1, showing the rounded hull that was standard with early-model Shermans. Photo source: Life Magazine.
Initially, the Wehrmacht focused its efforts for tank design on the Panzer III and Panzer IV, both medium tanks thought to be suitable for the battles ahead. Despite this concentration, German work on heavy tanks began in 1937. The Henschel firm produced a number of prototypes, known as Durchbruchwagen (DW) I, II, and Versuchsfahrgestelle (VK) 3001(H), VK 3601 and VK 6501. Additionally, the Porsche firm developed the VK 3001(P). None of these prototypes were put into production, but they gave both firms experience in producing larger tanks. Consequently, when the Wehrmacht invaded the Soviet Union in June 1941 and began encountering the T-34 medium tank and the KV-1 heavy tank, both of which were superior to the Panzer IV that was then fielded by the Germans, it became apparent that something more substantial would be required to defeat Soviet armor. [7] A requirement for a 45-ton tank was issued before the invasion, but combat added urgency to the design process. On April 19th, 1942, the Henschel and Porsche prototypes were presented to Adolf Hitler on his 53rd birthday at the Wolf’s Lair in East Prussia. A month following his birthday, Hitler issued a number of new requirements for the heavy tank- it had to have a frontal armor thickness of 100mm, and side armor of 60mm. Additionally, the new tank had to be armed with an 88mm gun.[8] Two months later, both designs were sent to testing grounds, where it was found that the Henschel design had superior maneuverability, and it was decided to put this prototype into production. Curiously, owing to numerous design changes put into effect by Hitler, Porsche had built 90 chassis to meet his requirements. When the Porsche design was turned down in favor of the Henschel, the 90 chassis were converted into Panzerjager- tank destroyers. These vehicles featured a large casemate-style superstructure housing an 88mm gun.[9]
The final form of the Porsche prototype. Ultimately the Porsche turret would be used on the Tiger I, while the chassis was built by Henschel. However, the Porsche design was built in limited numbers- many of these chassis were later converted to Elefant tank destroyers. Photo source: Wikipedia.
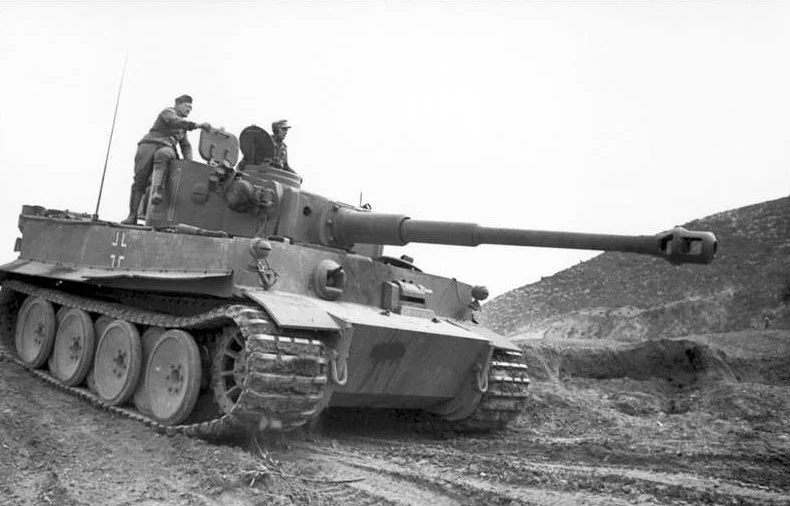
An early-production Tiger I in service in Tunisia. Photo source: Bundesarchiv.
The final Henschel design, which went into production in August 1942, featured an 88mm KwK 36 L/56 main gun which fired a variety of shells at high velocity. This gun had a maximum range of 6km, and its advanced optics gave it an effective combat range of 1.2km. The Tiger I had enough storage capacity to hold 92 rounds, including the Panzergranate 39 (PzGr. 39) which was an Armor-piercing, capped, ballistic cap (APCBC) round containing an explosive filler, the PzGr. 40, Armor-piercing, composite rigid (APCR) round containing a tungsten core for extra penetrative power, and the High-explosive Anti-tank round (HEAT) round. [10] The APCBC round was capable of penetrating 90mm of armor at ranges up to 2km, and the APCR round could penetrate 171mm of armor at short ranges and up to 110mm at 2km.[11] Armor thickness varied from 100mm on the front of the hull, superstructure, and turret, to 80mm on the sides of the turret and superstructure, to 60mm on the side of the hull. The rear of the tank was relatively unarmored.[12] Powering the Tiger was Maybach HL 210 P45, a V-12 liquid-cooled engine producing 650 horsepower. This would later replaced by another Maybach V-12 engine producing 700 horsepower. The Tiger’s maximum performance was 38km/h on the road and 20km/h cross-country, though these figures were hardly practical on a long-term basis. Despite the immense weight of this new tank (57 tons), the Tiger was to prove surprisingly mobile. This was owed to its very wide tracks (755mm), which distributed the tanks weight across terrain at 15psi.[13]
Despite all of these perks, the production of the Tiger came at quite a cost. The average cost for a Tiger I ran between 250,000-300,000 Reich Marks (RM); if a Tiger I in 1943 had cost 300,000RM, it would cost just over $1.2M in USD. By comparison, a Sherman in 1942 cost $33,000 to produce- adjusted for inflation, it would cost just over $500,000 in 2017 USD to build.[14] This meant that the Tiger cost six times what it cost to build a single Sherman- it was even far more expensive than other German tanks. The Panzer III cost 96,000RM, the Panzer IV cost 103,000RM, and the Panzer V “Panther” cost 117,000RM.[15] What was more, the mechanical complexity of the Tiger and the constant aerial bombardment of German industrial targets by Allied bombers meant that production of German armor, and the Tiger in particular, was stunted. It reportedly took 300,000 man hours to produce a Tiger I, twice the amount of time required to build a Panther.[16] Kassel, Germany, a site of Tiger production, was attacked 40 times over the course of the war by Allied bombers- on one occasion in October 1943, an RAF raid caused substantial damage to Henschel’s facilities and killed a large number of workers, delaying production.[17] Production of the Tiger maxed out in April 1944, with 105 tanks produced that month. Final production of the Tiger I totaled 1,347 vehicles.[18] This paled in comparison with the Sherman, production of which averaged over 1,200 tanks per month- eventually over 49,000 Shermans were built. [19]
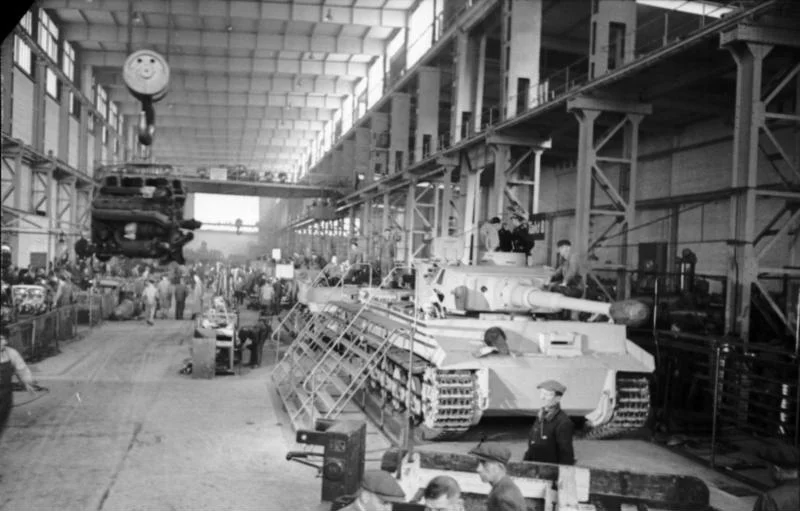
An assembly line for Tiger Is. Frequent bombing by Allied aircraft meant that production would ultimately be decentralized, further delaying the rate at which these complex tanks could be produced. Photo source: Bundesarchiv.
The Tiger first entered combat in limited numbers in August 1942, when 4 of these new heavy tanks were sent to the Eastern Front at Leningrad. Owing to a variety of causes, none of the four tanks completed their first day of combat duty successfully, though three were saved for subsequent operations. Additional early Tiger Is were sent to North Africa, though they did not arrive in large numbers and were unable to turn the tide against the Allies there. Thereafter, Tigers would see extensive service along both the Eastern Front and the Western Front following the invasion of Normandy in 1944. Eventually, Tigers were in service with ten Heer heavy tank battalions, three SS heavy tank battalions, and a training battalion.[20] Curiously much less known is the fact that the Tiger was also used or considered for use by a number of foreign countries. Germany’s fascist ally Spain was evidently interested in purchasing Tigers, but never made a transaction. Japan actually bought a Tiger for the remarkable price of 650,000RM in 1943, but without the means of reliable transport, the tank never left Germany. It was leased by Japan to Germany, which employed it in one of its heavy tank battalions.[21] The sole foreign operator of the Tiger was Hungary, which was given 13 Tiger Is in the summer of 1944. These tanks operated with the 3rd Regiment of the 2nd Armored Division and saw action that summer in Galicia against the Soviets. Most of these tanks would ultimately be abandoned due to mechanical difficulties, an issue which plagued the Tiger and will be discussed later.[22]
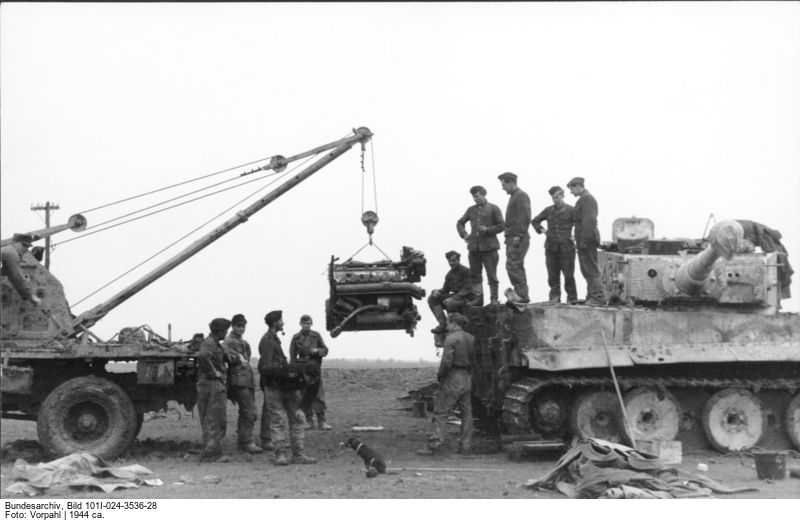
A Tiger I having its engine serviced along the Eastern Front. Photo source: Bundesarchiv.
Allied tankers quickly developed a fear of the Tiger from the outset that created a lasting impression. This is not altogether surprising, given the state of Allied tanks when the Tiger was introduced. The preponderance of Allied armor, the Western Allies in particular, was concentrated in the area of medium tanks, with relatively little thought given to the development of heavy tanks. This was perhaps a secondary effect of Allied tank doctrine developed during the inter-war years, which did not generally devote much thought to tank vs. tank combat. As a result, Allied medium tanks, with lower caliber guns with relatively low velocities and inadequate armor protection, were unprepared to deal with the new Tigers, which could withstand numerous hits from Allied tanks without suffering any apparent ill effects.
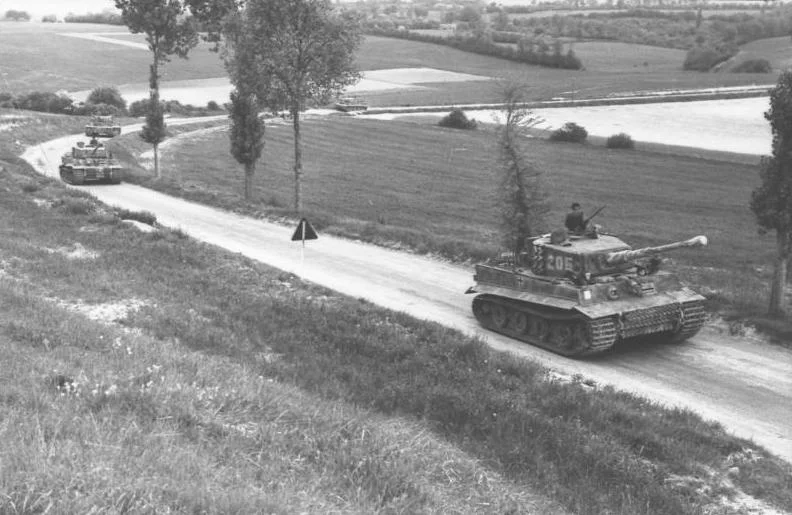
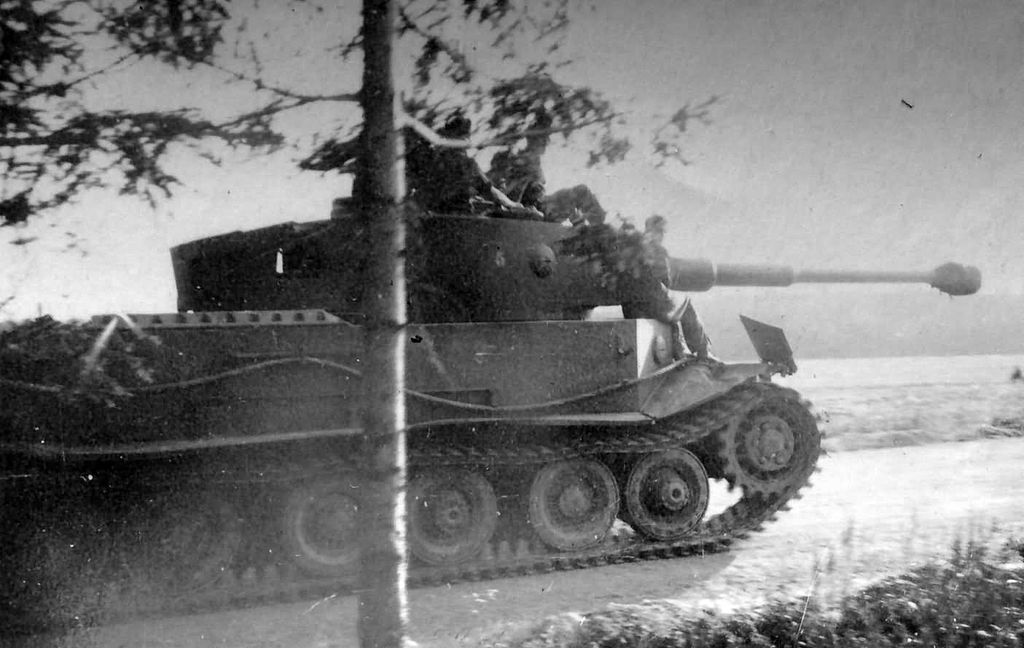
A column of Tiger Is on the move in Northern France in the summer of 1944. Photo source: Wikipedia.
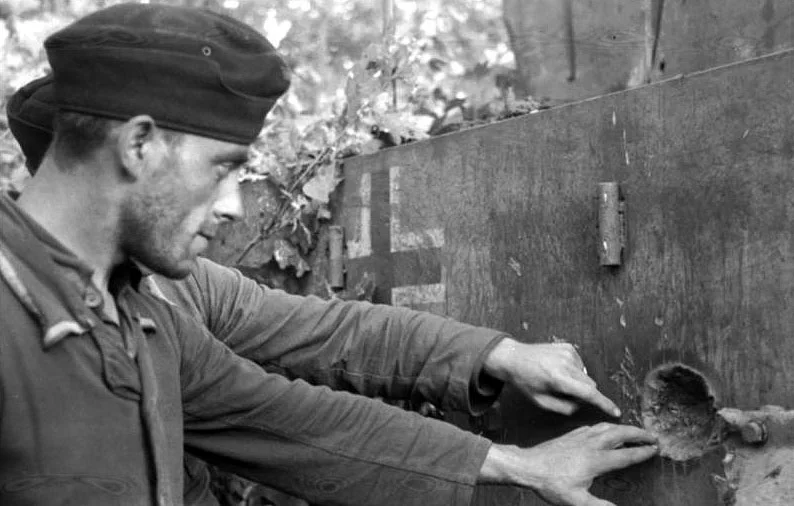
Tiger crewmen examine the impact mark left behind from a shell that failed to penetrate the Tiger's armor. It appears that this impact was on one of the sides of the tank. Photo source: Wikipedia.
As a result of their experience with the Tigers, all of the Allies began to develop solutions to combat the Tiger; many of these were interim fixes which modified already existing medium tanks to better survive in their combat environment. The Soviets would eventually develop the T-34-85, equipped with an 85mm gun to combat the Tiger and Panther. In the case of the Sherman, the British and the Americans developed two different versions that were capable of taking on the Tiger I. The first of these was the British “Firefly.”
The Firefly design almost didn’t occur; at the time, the British Ministry of Supply believed that the Centurion and Comet designs, then on the drawing boards, would be sufficient. However, until those tanks actually arrived on the battlefield, a stopgap would have to be found. The answer came in the form of the Firefly, which mated the Sherman design with the British QF 17-pounder anti-tank gun. This gun, equivalent to a 76.2mm caliber gun, had a muzzle velocity of up to 3,900 ft per second with a APCBC round. Testing would reveal that the gun could penetrate 116.5mm at 1500 yards while firing a APCBC round. The recoil of gun necessitated an extension of the rear of the turret, hence the box on the rear of the turret of all Fireflies. Fireflies quickly demonstrated their usefulness in Normandy; this was also noticed by German tankers, who targeted Fireflies first. As a result, many Fireflies would subsequently have the forward half of their barrels painted with a disruptive camoflauge to make them appear as an ordinary Sherman.[23]
The Americans were somewhat slower to adapt their primary tank to combat the Germans. An adhoc solution was the Jumbo Sherman- the M4A3E2. The Jumbo Sherman featured an extraordinary amount of additional armor welded to a standard M4A3, bringing the front hull thickness to 101mm and the sides up to 76mm. Jumbo Shermans arrived in numbers in the fall of 1944- some 250 M4A3 Shermans were converted to the Jumbo standard and were primarily used in breakthrough operations where the Jumbo’s armor proved to be more resilient against German anti-tank gun fire. Before the end of the war, a small number would even be upgraded with the newer high-velocity 76mm gun and HVSS suspension.[24]
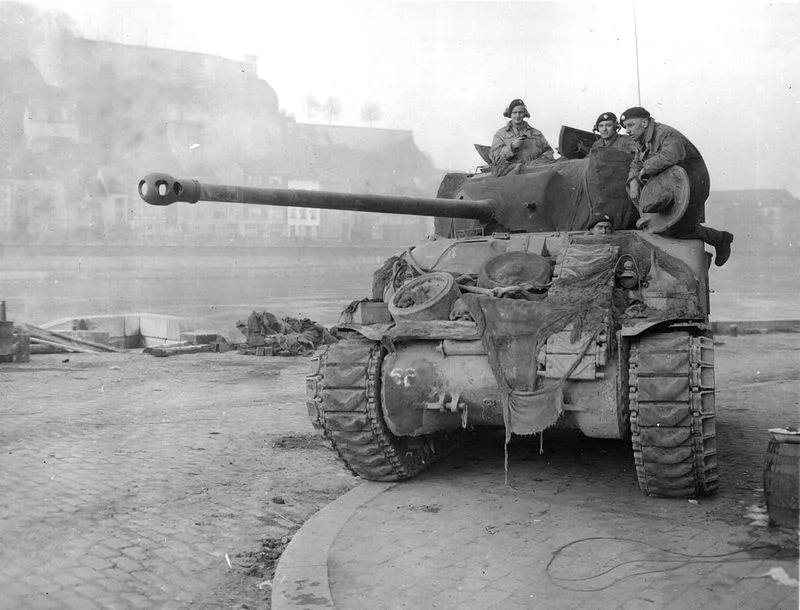
A British Firefly in Namur, 1944. With its 17-pounder anti-tank gun, the Firefly was the only tank that the Western allies had capable of penetrating the Tiger's frontal armor. German tankers quickly realized the danger posed by these tanks and would target them first, leading Firefly tankers to camoflauge the barrels of their Fireflies in turn to disguise them as regular Shermans. Photo source: Wikipedia.

A M4A3E2 "Jumbo" Sherman, which featured much thicker armor and a 105mm main gun. Thanks to their durability, the Jumbo Shermans were preferred for use in leading assaults. Photo source: Wikipedia.
The ultimate Second World War version of the Sherman for the Americans appeared in the form of the M4A3E8. This version fielded a number of upgrades and improvements to the existing Sherman design. The M4A3E8, alternatively known as the “Easy Eight,” was armed with a long-barreled 76.2mm gun and a newly-redesigned suspension system known as the Horizontal Volute Suspension System, an improved suspension system that allowed for better ride comfort and quicker reaction time for firing the main gun. Additionally, the new M93 HVAP (High Velocity Armor-Piercing) round was available for use in the main gun in this version, though this type of ammunition was primarily reserved for use by tank destroyer units.[25] The Easy Eight would soldier on in US service following the end of the Second World War, serving as one of the US 8th Army’s primary tanks during the Korean War. Production for the M4A3E8 totaled 4542 tanks.[26]
In addition to the 40,000+ Shermans which were built during the war, numerous other vehicles based on the Sherman chassis were also constructed during the war. One such vehicle was the M7 Priest Howitzer Motor Carriage. Introduced in early 1942, the Priest mounted a M1/M2 105mm howitzer atop the Sherman chassis with a modified superstructure to accommodate the gun. Some 4400 examples were produced by the end of the war. Another examples of Sherman derivatives included the M10 Wolverine, a tank destroyer adapted from the Sherman chassis. The M10 featured a 76.2mm gun with sloped armor- despite being outdated almost from its inception, the Wolverine saw service through the end of the war, with over 6700 being built. A refinement of the M10 took shape in the M36 Jackson, another tank destroyer that was armed with a 90mm gun. This version began to appear in line units during the fall of 1944- by the end of the war, 1400 had been built.[27] These were but a few models of vehicles based on the Sherman.

A M4A3E8 "Easy Eight" Sherman firing on communist positions during the Korean War. Photo source: Wikipedia.
An M7 Priest self-propelled gun, armed with a 105mm howitzer. The Priest was just one example of numerous designs based on the Sherman chassis. Photo source: Wikipedia.
By contrast, relatively few variants of the Tiger were produced during the war. A few examples of recovery vehicles and assault tanks were produced, but these were not built in large numbers. Making matters more difficult was the inherent complexity of building Tiger tanks which required countless man hours to produce. Additionally, with Allied bombers making concerted attacks on German industry, production had to be dispersed and was slowed accordingly.
In combat, the Sherman and Tiger developed opposite reputations. While the Sherman was derided for its weaker armor and comparatively light gun, it was found to be highly reliable. Additionally, owing to superior Allied tank recovery capability, knocked out Shermans were more readily recovered and repaired to working order again, barring a hit to a integral component such as the turret ring, which could not be replaced, or the tank burning for a substantial period of time. American and British crews were not alone in praising the Sherman for its reliability. A number of Shermans were exported to the Soviet Union as part of the Lend Lease Act, and Soviet crews generally like their American-supplied tanks. Dmitriy Ioza, a Soviet tank commander noted that the service life of the tracks on Shermans lasted approximately 5000 kilometers, twice as long as the Soviet T-34.[28] By contrast, the Tiger, while known to have armor nearly impervious to Allied guns and armed with a cannon lethal to Allied tanks at extraordinary ranges, was also known to be highly unreliable in the field. The transmission required constant maintenance to prevent failure. The overlapping road wheels had a tendency to freeze together when exposed to mud and the cold harsh Russian winter. The sheer width of the German tank meant that in order to move it by rail, a narrower set of tracks had to be fitted in order to be able to place it on a flat railroad car. Ultimately, many Tigers were not lost to enemy fire but to mechanical breakdown, and since the vehicle weighed so much, those that broke down near or at the frontlines were often unrecoverable because of their tremendous weight.[29]
An early-production Tiger I, showing the overlapping road wheels, which were prone to jamming in winter-time when mud would freeze between the wheels. Photo source: Wikipedia.
In spite of its poor mechanical qualities, Tiger units established tremendous kill-to-loss ratios. Three battalions established kill rations greater than 10 kills for every Tiger lost, including Schwere Panzer-Abteilung 502 (13.08 kills per loss), 13./Panzer-Regiment Grossdeutschland (16.67 kills per loss), and Schwere SS-Panzer-Abteilung 103 (12.82 kills per loss). The overall ratio for kills-to-losses for all Tiger battalions is 5.74-1.[30] Many German tank commanders amassed large numbers of kills. Among the well-known Tiger tank commanders were Sergeant Kurt Knispel, the highest-scoring tank commander in military history with 168 tank kills, First Lieutenant Otto Carius, who destroyed over 150 tanks, and most famously, Captain Michael Wittmann, who destroyed 138 tanks and 132 anti-tank guns on both the Eastern Front and in Normandy. Wittman became most famous for a single-tank action in which he took part during the campaign in Normandy. On June 13, 1944, Wittmann was reconnoitering terrain near the village of Villers-Bocage when he spotted a stationary column of British armor. Instead of waiting for reinforcements, Wittmann decided to mount a one-tank attack. After knocking out the front and rear vehicles, Wittmann advanced down the column and proceeded to destroy vehicles at point blank range. By the end of the battle, Wittmann had destroyed over a dozen tanks, a dozen personnel carriers and armored vehicles, and a small number of anti-tank guns. [31] Wittmann would be killed two months later on August 8th by a round fired by a Sherman Firefly of the 1st Northhamptonshire Yeomanry.[32]
Kurt Knispel, the highest-scoring tank commander in military history. Knispel was killed shortly before the end of the war. Photo source: Wikipedia.
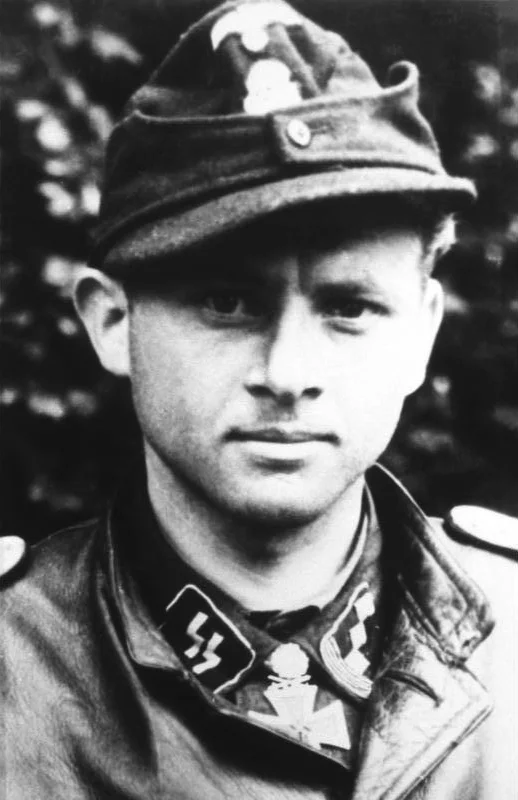
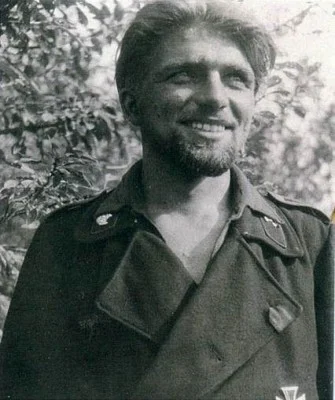
Michael Wittmann, another high-scoring tank ace who scored the majority of his kills in Tigers. Photo source: Wikipedia.
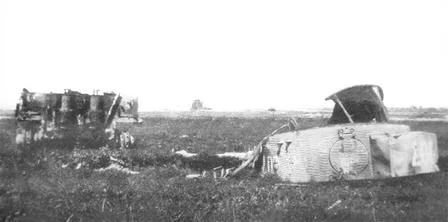
The remains of Wittmann's Tiger in which he was killed. Wittmann was killed in August 1944, likely by a British Firefly. Photo source: Wikipedia.
Owing to the sheer numbers of Shermans produced and relatively few German tanks built in comparison, Sherman tankers were never going to achieve a similar number of tank kills. However, the Allies had tank aces who used Shermans as well. Perhaps the most well-known US tank commander was then Staff Sergeant Lafayette G. Pool of the 3rd Armored Division. In less than three months, Pool and his crew were credited with destroying 258 enemy vehicles, including 12 tanks. Pool was knocked out of the war on September 21, 1944 when he was badly wounded when his Sherman was hit twice by a German Panther medium tank. He ultimately had a leg amputated but would remain in the Army after the war until 1960- he died in 1991.[33] Another Sherman ace was Syndey Valpy Radley-Walters, a Canadian who had destroyed 18 tanks by the end of the war, making him the top Allied tank ace. Radley-Walters would also stay in the military after war, remaining in the Canadian Army until he retired as a Brigadier General in 1974. He passed away in 2015.[34]
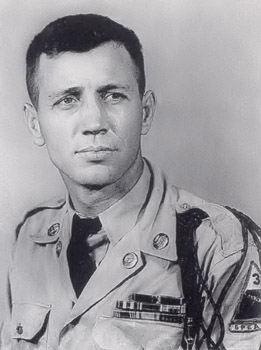
Lafayette Pool, who served with the 3rd Armored Division. Pool was likely the highest-scoring American tank ace in the war, and scored all of his kills in a three month period before he was removed from combat after losing a leg. Photo source: Wikipedia.
With the huge numbers of tank kills claimed by German tank commanders, one may assume then that the Sherman suffered heavily at the hands of the German Panzers. However, analysis after the war shows that this was not necessarily the case. According to a report compiled by Fort Knox from reports of 100 tank commanders, engagements with other armored vehicles, especially tanks, were relatively rare-an estimated 15%.[35] This was even more evident on the Western Front, which at least initially did not see an abundance of German armor. A German estimate puts the number of tanks and armored vehicles in France on D-Day numbered 2,000-2,400 vehicles, though postwar figures put that number at 1,200 tanks and 800 assault guns.[36] These numbers were not equal to those deployed on the Eastern Front- as a consequence, Allied tank casualties were not caused primarily by tanks but by anti-tank guns. A postwar survey of US, British and Canadian tank losses during the war found that of the 12,140 destroyed or knocked-out tanks sampled, 54% were lost to gunfire from tanks or anti-tank guns.[37] Of those tanks lost to gunfire, 86% were lost to 75mm and 88mm guns.[38] The survey also notes that of the losses inflicted by 88mm guns, most were caused by dual-purpose guns operating in the anti-tank gun role- not by tanks. The report further notes that 88mm guns armed only a limited number of vehicles.
“The preponderance of damage done by the 88mm gun was undoubtedly caused when this gun was on its antitank or dual-purpose mount. German production figures clearly indicate that only a limited number of tanks mounting the 88mm gun, or 8 percent of the total, were being produced in the summer of 1944.”[39]
If these figures are true and the survey accurate, why then was there such a stigma attached to the Tiger by Allied troops? The Tiger appeared more commonly on the Eastern Front, and even then was never present in anything even approaching the numbers of its nemesis, the T-34 and Sherman. It seems likely that the tank acquired its reputation as a result of anecdotes of the Tiger’s seeming imperviousness and Allied inability to destroy them with anything less than overwhelming numbers. Coupled with this was the Tiger’s ability to destroy targets at much greater ranges than its adversaries with its 88mm gun. Such was the fear of the 88 that the survey notes that US soldiers believed that “every heavy-caliber flat-trajectory weapon that fired at him was an “88”…” This was in spite of evidence that 75mm guns in the ETO caused 40% of the destruction of the surveyed tanks.[40]
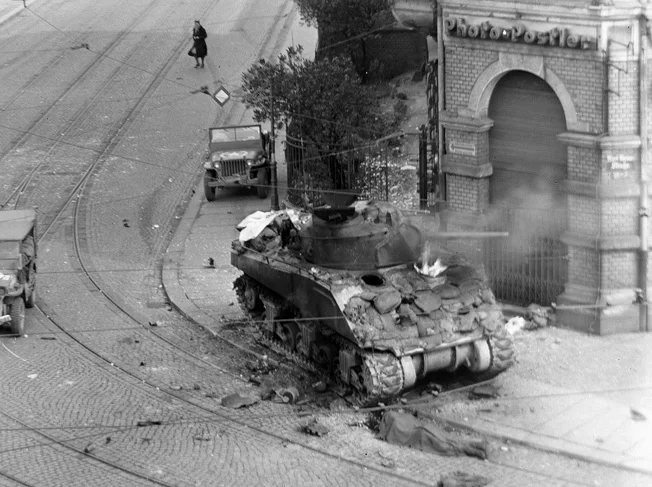
A scene that became all-to-familiar to Allied soldiers in Europe- a Sherman ablaze. Photo source: Wikipedia.
Data on German tank casualties is more limited. The same survey as mentioned previously attempts to expound on German losses, though the report authors themselves note that reports on the subject are incomplete and do not provide a full picture. The survey estimates that of the German tanks inspected, 44% had been lost to “miscellaneous causes, of which non-enemy causes accounted for over 98 percent. Mechanical or terrain causes knocked out about 10 percent of the miscellaneous total.”[41] Coming in just below losses to miscellaneous causes is losses to Allied gunfire, which amounted to 43%. Though greatly feared by German tankers, USAAF and RAF fighter-bombers are estimated to have caused only 8% of armor losses, and these were mainly due to direct hits from rockets.[42] While these records are not complete, they do seem to substantiate German accounts of being forced to abandon vehicles to mechanical losses.

This Tiger met the same fate as many of its fellows- it was abandoned after becoming immobilized in a pile of rubble. Photo source: Wikipedia.
Production of both tanks ceased with the end of the war, but for the Sherman, the war’s cessation did not mean an end to service. The Sherman saw extensive service in the Korean War alongside its larger replacements, the M26 Pershing and the M47 Patton. Following the Korean War’s end, the Sherman was taken out of US service. However, various versions of the Sherman would see extensive combat service with the Israeli Army beginning in the 1950s. After obtaining a small number of wrecked Shermans from European junkyards, the Israelis were forced to improvise in restoring them to working order, even installing old World War I-era 77mm German field guns on a few.[43] Eventually, a larger supply of old Shermans was found and the Israelis began modifying them in to the M-50 standard with French support. The M50 Sherman mounted a French CN 75-50 75mm main gun, improved HVSS suspension, and in some cases a diesel Cummins engine. Roughly 100 Shermans were upgraded to the M-50 standard.[44] In the early 1960s and in response to increasingly better-armed hostile neighbors, the Israelis again turned to France for upgraded Shermans. This time the product was the M51 Isherman, produced by Atelier de Bourges, the same company responsible for the M50. The M51 featured a new turret which housed a 105mm gun, a 460-horsepower Cummins diesel engine, and a new hydraulic system and wider tracks to accommodate the increased weight of the modified tank. About 200 of Israel’s Shermans were modified to the M51 standard.[45]
Israeli Shermans saw service in the 1956 Suez Crisis, the 1967 Six Day War, and the 1973 Yom Kippur War. During the Six Day War, the Israeli army used the Sherman on all three fronts, including on the Syrian Front where, curiously, the Sherman faced off against modified Panzer IV and Sturmgeschutz IV tanks and assault guns, the same vehicles it saw combat with twenty years earlier. The Israeli army also used Sherman chassis as self-propelled guns, fitting French 155mm guns to the superstructure. Following the end of the Yom Kippur War, the M50 and M51 Shermans were gradually withdrawn from active service as they were replaced with more modern tanks.[46]

An Israeli M51 Super Sherman, alongside an early M50. Photo source: Wikipedia.
Incredibly, the Sherman continues in limited service in the present day. As of 2014, Paraguay has reactivated three Shermans which had been in storage with refurbished engines and new machine guns. These tanks were obtained from Argentina in 1980, and are likely being used for training purposes. Oddly, Paraguay also has a small number of M3 Stuart light tanks, which it also planned to restore to use for training.[47] In addition, there are numerous examples of Sherman tanks preserved around the world as they appeared during World War II. Many have been restored to working order and are in civilian hands, frequently appearing in reenactments. The Tiger has not been so fortunate. The vast majority of Tigers which were not outright destroyed during the war appear to have been scrapped since then. As a result, only a small handful exist today. A total of six Tiger Is of the original 1,300 are preserved in museums or as war memorials. Only one, Tiger 131 at the Bovington tank museum, remains functional.
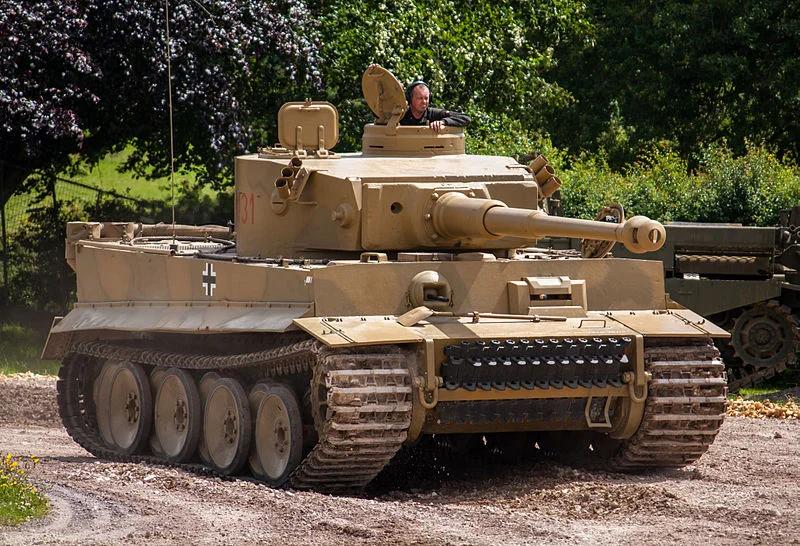
The only functional Tiger I in the world resides in the Bovington Tank Museum in England. Photo source: Wikipedia.
As described in this article, the Sherman and Tiger I tanks were completely different vehicles intended for entirely different purposes. In spite of this, they are frequently compared against one another. This comparison overlooks what army planners envisioned for both tanks. The Sherman was intended from the start to be a reliable, easy-to-mass-produce medium tank which could both face off against enemy medium tanks and provide fire support to infantry. In this role, the Sherman functioned well- apart from its main gun, it was comparatively similar to the Panzer IV, its opposite number. Later versions of the Sherman would prove superior to the Panzer IV and could take on heavier tanks. Shermans were built in massive numbers, which meant that tanks that were destroyed could be readily replaced with new ones. What’s more, knocked-out Shermans were frequently repaired and sent back to the front to fight again. Underlining the Shermans’ utilitarian design is the fact that numerous other armored vehicles utilized its chassis. The Tiger on the other hand was designed in response to Soviet tanks to be capable of being used as a breakthrough tank, and later used as a kind of mobile bunker to stop Soviet armored thrusts. In this role, it was quite successful. However, as it was manufactured in small numbers, it was unable to reverse the tide of the war. The design was also plagued with mechanical and operational difficulties which affected its readiness at the front. Ultimately, it must be understood that both of these tanks were in general successful for the roles they were built for, but because of their distinct differences, it is not possible to compare one to the other.
Sources
1. B., David. “Medium Tank M4 Sherman.” Tank Encyclopedia, 19 Aug. 2017, www.tanks-encyclopedia.com/ww2/US/M4_Sherman.php.
2. Taylor, Blaine. “M4 Sherman: ‘Blunder’ or ‘Wonder’ Weapon?” Warfare History Network, Sovereign Media, 15 Nov. 2016, warfarehistorynetwork.com/daily/wwii/m4-sherman-blunder-or-wonder-weapon/.
3. Conners, Chris. “Medium Tank M4A1 Sherman, Early production1-8.” Medium Tank M4 Sherman, 20 July 2017, afvdb.50megs.com/usa/m4sherman.html.
4. “Panzerkampfwagen VI Tiger Ausf. E Sd. Kfz. 181.” Achtung Panzer RSS, Weider History Group, www.achtungpanzer.com/panzerkampfwagen-vi-tiger-ausf-e-sd-kfz-181.htm.
5. Hamby, Alan. “The Story of the Tiger I .” Tiger I Information Center - Tiger History, www.alanhamby.com/history.shtml.
6. Prado, Fabio. “History of the Tiger I.” The Life and Times of Germany's Tiger Tanks: PzKpfw VI TIGER I, The ARMOR Site!, 2009, www.fprado.com/armorsite/tiger1.htm.
7. “M4 Furious – 11 Essential Facts About the Sherman Tank.” MilitaryHistoryNow.com, MilitaryHistoryNow.com, 31 Mar. 2016, militaryhistorynow.com/2014/10/22/furious-11-essential-facts-about-the-m4-sherman-tank/.
8. B., David. “Panzer VI Tiger.” Tank Encyclopedia, 27 Sept. 2017, www.tanks-encyclopedia.com/ww2/nazi_germany/Panzer-VI_Tiger.php.
9. B., David. “Sherman VC Firefly.” Tank Encyclopedia, 29 Aug. 2017, www.tanks-encyclopedia.com/ww2/gb/Sherman_Firefly.php.
10. Pawley, A. J. “M4A3E2 Jumbo Assault Tank.” Tank Encyclopedia, 18 Apr. 2017, www.tanks-encyclopedia.com/ww2/US/m4a3e2-jumbo-assault-tank.
11. Loza, Dmitriy. “Dmitriy Loza.” Я Помню. Герои Великой Отечественной Войны. Участники ВОВ. Книга Памяти, Federal Agency for Press and Mass Communication, 21 Sept. 2010, iremember.ru/en/memoirs/tankers/dmitriy-loza/.
12. Reynolds, Michael. “Disaster at Villers-Bocage: Wittman's Tigers vs. the Desert Rats.” Warfare History Network, Sovereign Media, 25 Jan. 2017, warfarehistorynetwork.com/daily/wwii/disaster-at-villers-bocage-wittmanns-tigers-vs-the-desert-rats/.
13. Miskimon, Christopher. “Site Navigation.” Warfare History Network, Sovereign Media, 17 May 2017, warfarehistorynetwork.com/daily/wwii/the-death-of-michael-wittmann-panzer-ace/.
14. Fong, Dan. “3rd Armored Division History Foundation [ 3d / Third ].” 3rd Armored Division History Foundation [ 3d / Third ], Www.3AD.Com, 2003, www.3ad.com/.
15. Mantle, Craig, and Larry Zaporzan. “The Leadership of S.V. Radley-Walters: The Normandy Campaign Part Two.” The Leadership of S.V. Radley-Walters: The Normandy Campaign ~ Part Two of Two, Government of Canada, National Defence, Canadian Defence Academy, 15 Oct. 2009, www.journal.forces.gc.ca/vol10/no1/09-mantle%20zaporzan-eng.asp.
16. “Israeli Shermans: The Most Powerful Shermans Ever to See Action.” The Sherman Tank Site, WordPress, 20 Dec. 2015, www.theshermantank.com/tag/hvss/.
17. Majumdar, Dave. “WWII Sherman Tanks: Back in Action in 2016.” The National Interest, The National Interest, 30 Dec. 2015, nationalinterest.org/blog/the-buzz/wwii-sherman-tanks-back-action-2016-14768+.
18. Miskimon, Christopher. “Sherman Tanks of the Israeli Army.” Warfare History Network, Sovereign Media, 14 Sept. 2016, warfarehistorynetwork.com/daily/military-history/sherman-tanks-of-the-israeli-army
[1] http://www.tanks-encyclopedia.com/ww2/US/M4_Sherman.php
[2] http://www.tanks-encyclopedia.com/ww2/US/M4_Sherman.php
[3] http://warfarehistorynetwork.com/daily/wwii/m4-sherman-blunder-or-wonder-weapon/
[4] http://www.tanks-encyclopedia.com/ww2/US/M4_Sherman.php
[5] http://afvdb.50megs.com/usa/m4sherman.html
[6] http://www.tanks-encyclopedia.com/ww2/US/M4_Sherman.php
[7] http://www.achtungpanzer.com/panzerkampfwagen-vi-tiger-ausf-e-sd-kfz-181.htm
[8] http://www.alanhamby.com/history.shtml
[9] http://www.tanks-encyclopedia.com/ww2/nazi_germany/Panzer-VI_Tiger.php
[10] http://www.fprado.com/armorsite/tiger1.htm
[11] http://www.achtungpanzer.com/panzerkampfwagen-vi-tiger-ausf-e-sd-kfz-181.htm
[12] http://www.fprado.com/armorsite/tiger1.htm
[13] http://www.fprado.com/armorsite/tiger1.htm
[14] http://militaryhistorynow.com/2014/10/22/furious-11-essential-facts-about-the-m4-sherman-tank/
[15] http://www.alanhamby.com/history.shtml
[16] http://www.alanhamby.com/history.shtml
[17] http://www.alanhamby.com/factory3.shtml
[18] http://www.tanks-encyclopedia.com/ww2/nazi_germany/Panzer-VI_Tiger.php
[19] http://www.tanks-encyclopedia.com/ww2/US/M4_Sherman.php
[20] http://www.alanhamby.com/history.shtml
[21] http://www.achtungpanzer.com/panzerkampfwagen-vi-tiger-ausf-e-sd-kfz-181.htm
[22] http://www.tanks-encyclopedia.com/ww2/nazi_germany/Panzer-VI_Tiger.php
[23] http://www.tanks-encyclopedia.com/ww2/gb/Sherman_Firefly.php
[24] http://www.tanks-encyclopedia.com/ww2/US/m4a3e2-jumbo-assault-tank
[25] http://warfarehistorynetwork.com/daily/wwii/m4-sherman-blunder-or-wonder-weapon/
[26] http://www.tanks-encyclopedia.com/ww2/US/M4_Sherman.php
[27] http://www.tanks-encyclopedia.com/ww2/US/M4_Sherman.php
[28] http://iremember.ru/en/memoirs/tankers/dmitriy-loza/
[29] http://www.alanhamby.com/history.shtml
[30] http://www.fprado.com/armorsite/tiger1.htm
[31] http://warfarehistorynetwork.com/daily/wwii/disaster-at-villers-bocage-wittmanns-tigers-vs-the-desert-rats/
[32] http://warfarehistorynetwork.com/daily/wwii/the-death-of-michael-wittmann-panzer-ace/
[34] http://www.journal.forces.gc.ca/vol10/no1/09-mantle%20zaporzan-eng.asp
[35] Survey of Allied Tank Casualties in World War II, p. 44
[36] Survey of Allied Tank Casualties in World War II, p.80
[37] Survey of Allied Tank Casualties in World War II, p.2
[38] Survey of Allied Tank Casualties in World War II, p.4
[39] Survey of Allied Tank Casualties in World War II, p.25-27
[40] Survey of Allied Tank Casualties in World War II, p.24
[41] Survey of Allied Tank Casualties in World War II, p.89
[42] Survey of Allied Tank Casualties in World War II, p.87-89
[43]http://www.theshermantank.com/tag/hvss/
[44] http://warfarehistorynetwork.com/daily/military-history/sherman-tanks-of-the-israeli-army/
[45] http://warfarehistorynetwork.com/daily/military-history/sherman-tanks-of-the-israeli-army/
[46] http://warfarehistorynetwork.com/daily/military-history/sherman-tanks-of-the-israeli-army/
[47] http://nationalinterest.org/blog/the-buzz/wwii-sherman-tanks-back-action-2016-14768